NOTE: This is a draft version of the documentation
Self-hosted GitHub (also called GitHub Enterprise Server) integration
TECHNICAL NOTE: WP Engine Atlas integration with any self-hosted GitHub instance is based on GitHub Apps - the officially recommended way to integrate with GitHub. WP Engine Atlas integration uses service (WP Engine Atlas services) to service (self-hosted GitHub API) communication - if you notice any problems with the communication between services please visit the "Troubleshooting" paragraph of this document.
Creating a GitHub Application
For the general instructions on creating a GitHub App click here. It doesn't matter, from WP Engine Atlas integration perspective, if you create a GitHub App owned by a user account or an organization, so chose whatever fits you better. Follow the instructions until reaching the "Register new GitHub App" form
From the "Register new GitHub App" page, follow these steps to create your GitHub App for the WP Engine Atlas integration:
- Set any "GitHub App name" (such as WP Engine Atlas)
- Set any "Homepage URL" (such as https://wpengine.com/atlas)
- In "Identifying and authorizing users":
- enter the following address in the "Callback URL" field below:
- In the "Webhook" section:
- Disable the "Active" checkbox
- Enable the required "Repository permissions":
- Checks: [Read & write]
- Contents: [Read-only]
- Metadata: [Read-only]
- Webhooks: [Read & write]
- Commit statuses: [Read & write]
- In "Where can this GitHub App be installed?"
- Select "Any account"
- Press the "[Create GitHub App]" button
Generating the necessary GitHub App credentials
- In the "Client secrets" section, click "Generate a new client secret"
- a client secret is required for WP Engine Atlas integration and is passed to WP Engine during next steps
- note that the client secret won't be visible after leaving this page - copy and paste it somewhere, or make sure that the page is kept open until reaching the "Configuring the self-hosted GitHub instance in WP Engine Atlas" paragraph
- In the "About" section notice two fields: App ID and Client ID
- the values of these fields are passed to WP Engine during next steps
- In the "Private keys" section generate a private key. A
.pemprivate key file will be downloaded to your computer.- A .pem private key file is required for WP Engine Atlas integration and is passed to WP Engine during next steps
Verifying the GitHub App configuration
- Make sure that the GitHub App configuration is valid:
- there is a callback present in the GitHub App configuration mentioned in point 3. of paragraph "Creating a GitHub Application" in this document. You can verify this in GitHub App details page → left-side menu → "General" → "Basic information" section → "Callback URL"
- the appropriate "Repository permissions" mentioned in point 5. of paragraph "Creating a GitHub Application" in this document are set. You can verify this in GitHub App details page → left-side menu → "Permissions & events"
Installing the GitHub App in repositories
- In "About" section of the GitHub App details page copy the "Public link" and visit it (or click "Public page" in menu on left)
- In the GitHub App's public page click "Install"
- Choose an entity (it can be organization or user account) from your self-hosted GitHub instance for which you want to install the GitHub App
- Choose the entity's repositories where GitHub App should be installed
The installation could also be done from the GitHub App details page - with the "Install App" item in the left-side menu.
Configuring the self-hosted GitHub instance in WP Engine Atlas
The self-hosted GitHub instance in WP Engine Atlas is configured during the creation of an Atlas App (a headless app).
-
In WP Engine User Portal visit the Atlas section
-
Click "Create app"
-
Choose "Self-hosted GitHub"
-
Click "Add server"
-
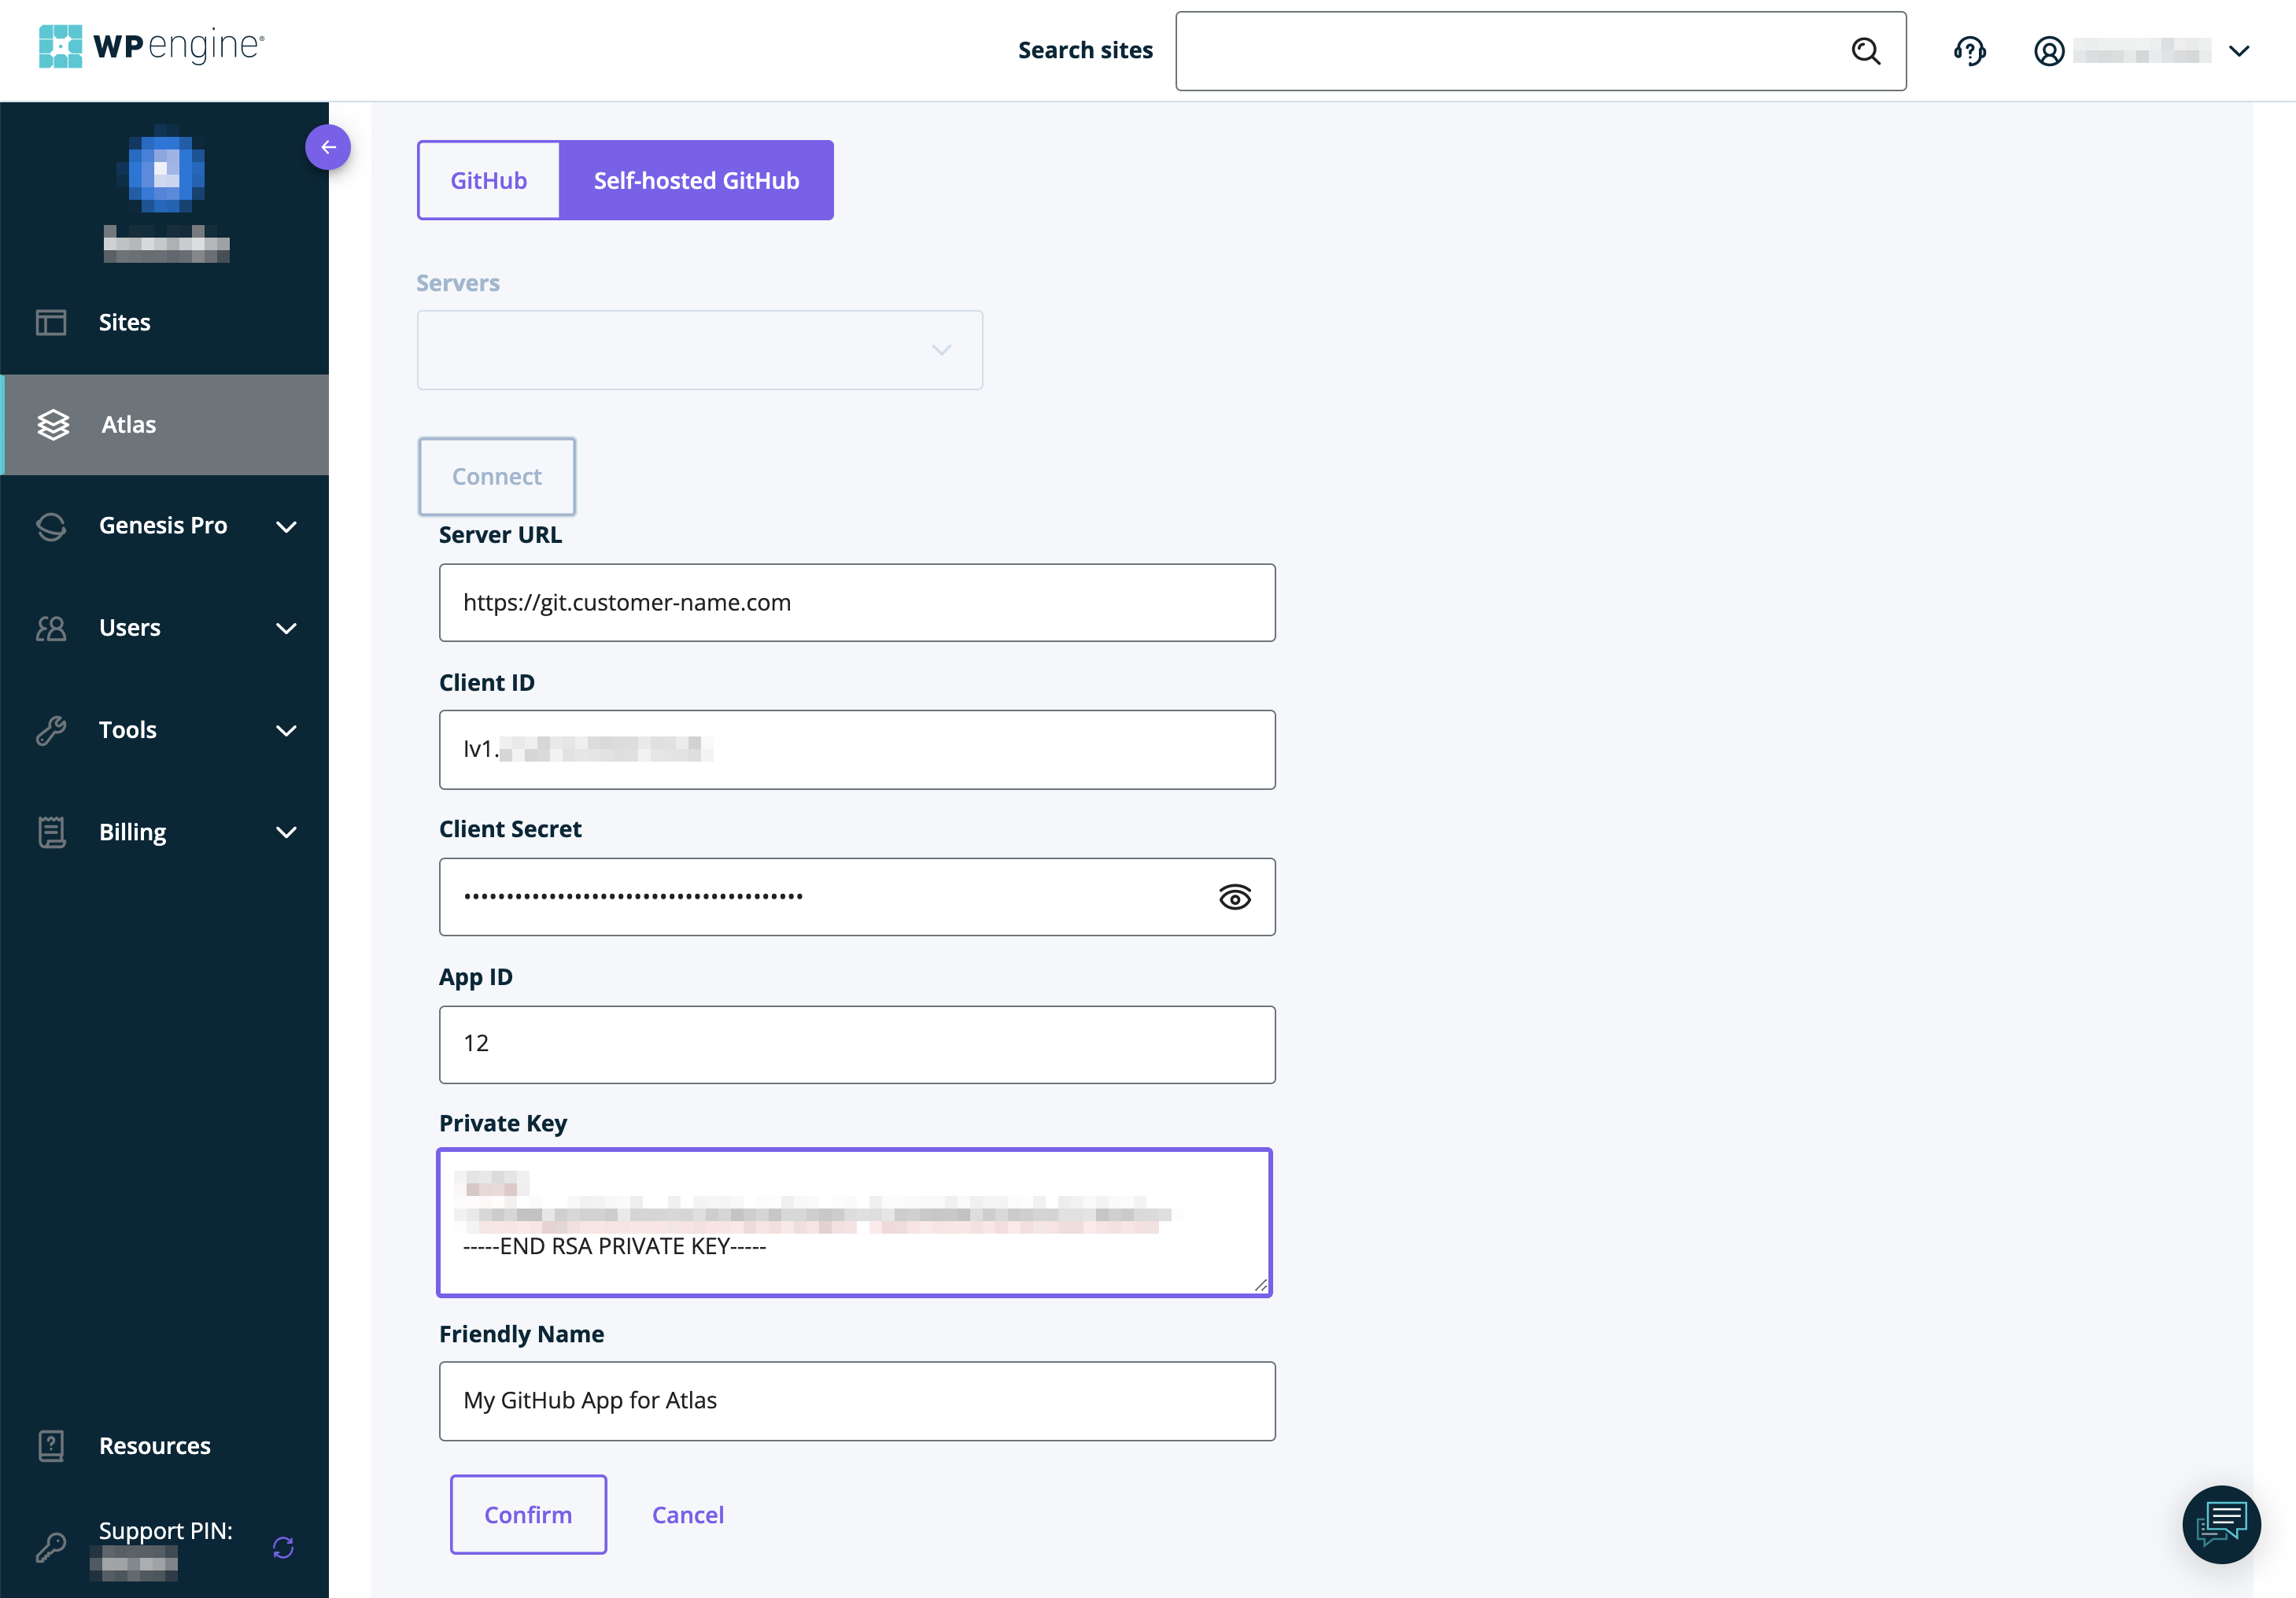
In the displayed form fill in:
- "Server URL" with your self-hosted GitHub API base URL (for example,
https://git.customer-name.com) - "Client ID" with the value mentioned in point 4. of paragraph "Generating necessary GitHub App credentials" in this document
- "Client Secret" with the value mentioned in point 3. of paragraph "Generating necessary GitHub App credentials" in this document
- "App ID" with value mentioned in point 4. of paragraph "Generating necessary GitHub App credentials" in this document
-
"Private Key" with the contents of the file mentioned in point 2. of paragraph "Generating necessary GitHub App credentials" in this document
- on macOS, you can either copy the contents of the file in Terminal:
or open the directory in Finder, right-click the file, choose "Open with" → "Other...", select "TextEdit.app", and copy the contents of the editorpbcopy < ~/Downloads/<app name>.<date>.private-key.pem - on Windows, open the file with Notepad and copy the contents
Be sure to include the
-----BEGIN RSA PRIVATE KEY-----and-----END RSA PRIVATE KEY-----lines. - on macOS, you can either copy the contents of the file in Terminal:
-
- "Friendly Name" with any value that will help you to identify the configuration
- "Server URL" with your self-hosted GitHub API base URL (for example,
-
Click "Confirm"
- between the click and the end of the process of passing the data to WP Engine a request to your self-hosted GitHub instance is made to verify if the provided details are valid - in case of any problems in this step check out the "Troubleshooting" paragraph of this document
-
From the "Servers" dropdown choose the newly added configuration. From now on, this configuration can be used to create Atlas apps using repositories on your server.
-
Click "Connect"
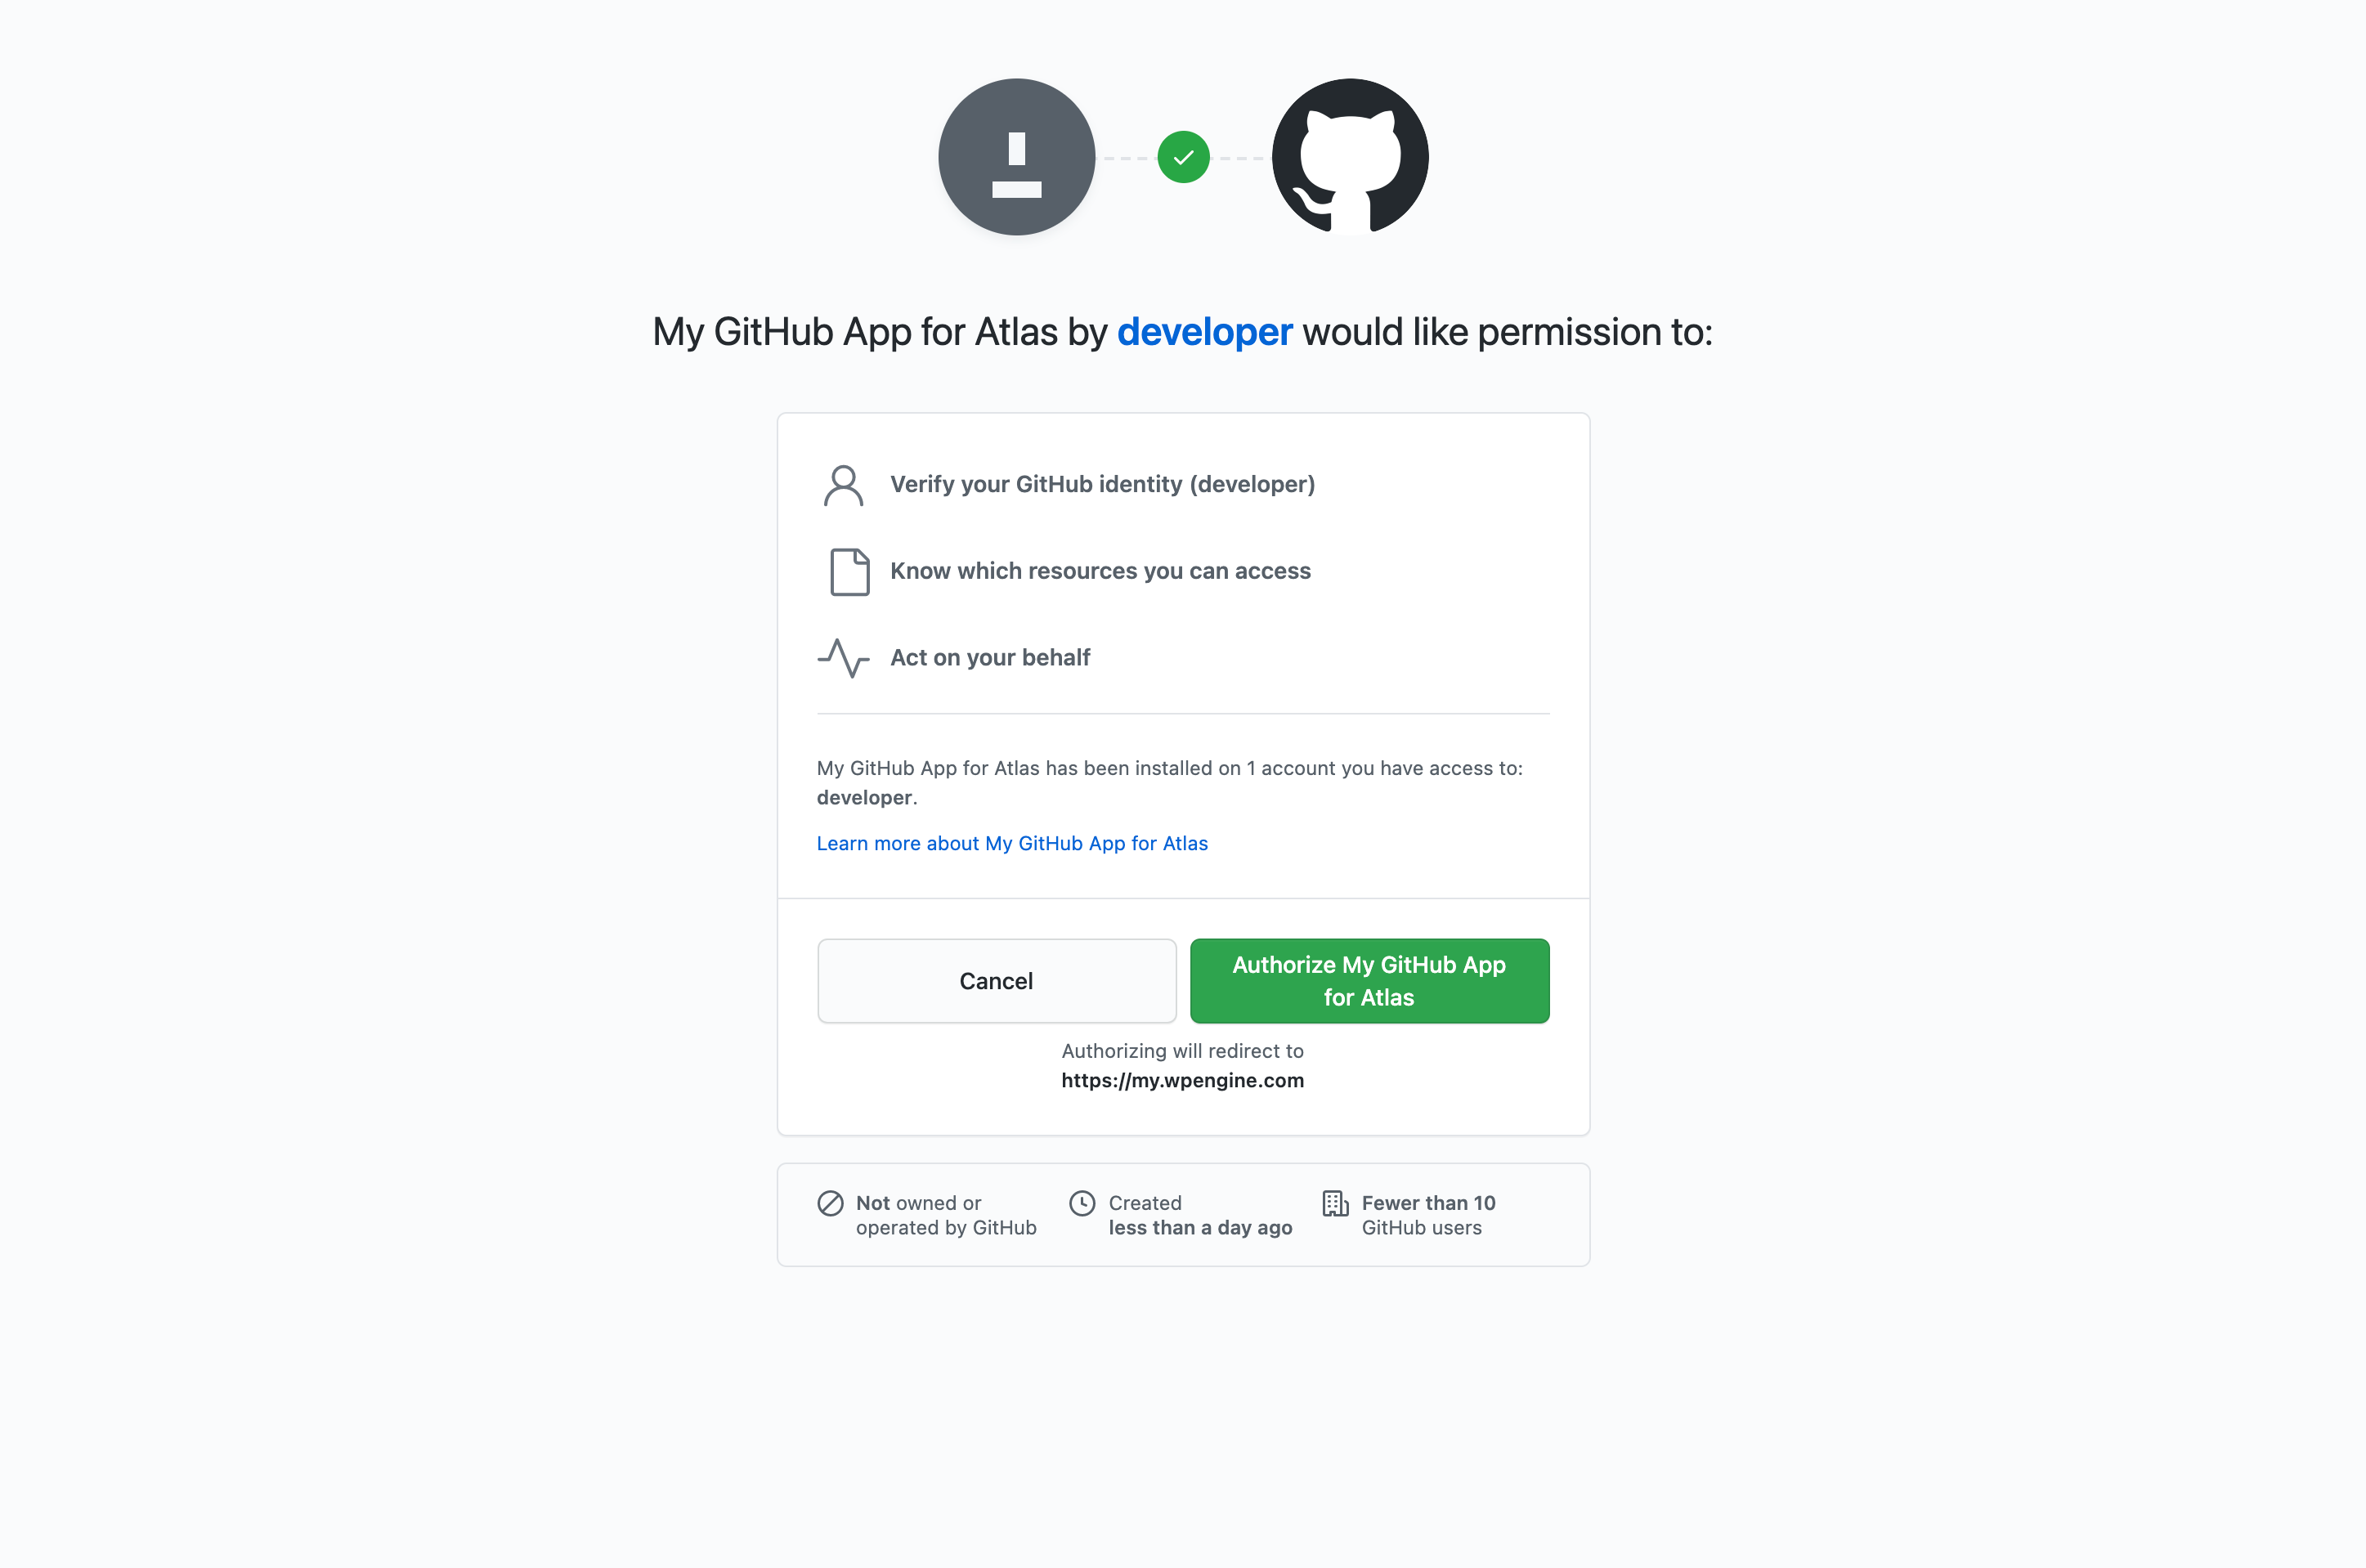
- The authorization page of your self-hosted GitHub instance should be displayed
- Click "Authorize name of your GitHub app"
- You will be redirected to User Portal's page - close it or wait until it will close itself and come back to the WP Engine User Portal
-
In the "Select a repository" section there will appear a list of the repositories to which both your GitHub account (from your self-hosted GitHub instance) and GitHub App (created in your self-hosted GitHub instance) have access.
-
Choose the repository that you want to use for your Atlas App and click "Continue" to proceed.
-
From now on, follow the standard environment creation process.
Troubleshooting
- The customer must ensure open external access (for example, in a firewall, if they have one) to their self-hosted GitHub instance's API, for the IPs from region
US Central. For a detailed list of specific IPs please contact the WP Engine Atlas support.
(END)

